How to Build A 3-in-1 Plyometric Box
- Maia Sobejana
- May 30, 2020
- 2 min read

There are so many benefits of doing plyometric exercises because they work so many muscle groups all at once and they help to improve strength, explosiveness, speed and power. Many of these exercises involve a box for you to step-over or to jump on to, for example. However, many of these boxes can get quite expensive and usually get delivered to you unassembled. Buying the wood and assembling it yourself will not only save you A LOT of money, it'll also make your workouts on the box much more worth it!
The plyo box that will be making has 3 different heights to it. The measurements of this box will be 30" x 24" x 20" (76 x 61 x 51cm). This means that the box is highly adaptable and can be adjusted to suit your fitness needs.
Tools and Materials Needed
Drill
Screws
Screwdriver bit
Wood glue
Sanding Paper
244 x 122cm, 1.8cm thick plywood
Coffee ;)

Step 1: Measuring the size of the cuts
The box will be 76 x 61 x 51cm. All numbers mentioned from here on will be in centimetres.
You'll need to cut the plywood into the following:
2 of 76 x 51cm pieces
2 of 76 x 57.4cm pieces
3 of 57.4 x 47.4cm pieces
We had our plywood cut by the staff in the home depot store because this saves a lot of time and mess. Check with your home depot store if there is an option of them cutting the pieces for you.

Step 2: Lay-out all the pieces on the ground
Before you start gluing and screwing things together, layout all the pieces on the ground like shown in the picture. This is like a blueprint and will give you an idea of which pieces have to go together. This will prevent any confusion when you actually start putting pieces together.

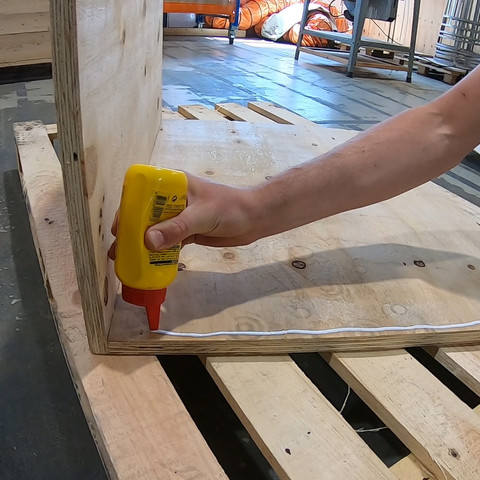
Step 3: Glue and Screw
Start by putting wood-glue on the side that you would like to start with. This will give the box extra stability. Before screwing the pieces together, you should pre-drill the wood so that the wood will not crack when during the screwing process. We used 4 screws, which were spread evenly across the wood, to secure the pieces together. Once you have only one piece of wood left, stop there and move on to the next step.
Tip: use a pencil as a measuring tool for equal measurements between the screws.


Step 4: Making the handles
The handles should be made before closing up the box so that you won't have saw dust stuck in your box. The saw dust could come out from your box every time you move it, and you definitely do not want that! The handles that we made were 14 cm in length but you can change this to your liking.


Step 5: Sand your box
Once you have a complete box, it's important you sand everything down so that you will not have splinters or have your shins eaten alive by the box when you're using it. They. are. nasty.

There you have it! Congratulations on building your own plyo box! We had a lot of fun building this and I hope you will too.
Comments